- Published on
How to Set Up Plane: The Ultimate Free Jira Alternative
- Authors

- Name
- Yashraj Singh
- ysraz-singh
Are you looking for a cost-effective, self-hosted project management tool that rivals Jira? Plane, an open-source alternative, provides robust features for task management, project tracking, and team collaboration — all at no cost. In this article, we'll guide you through setting up Plane using Docker, giving you a powerful project management system without the associated costs of proprietary solutions.
What is Plane?
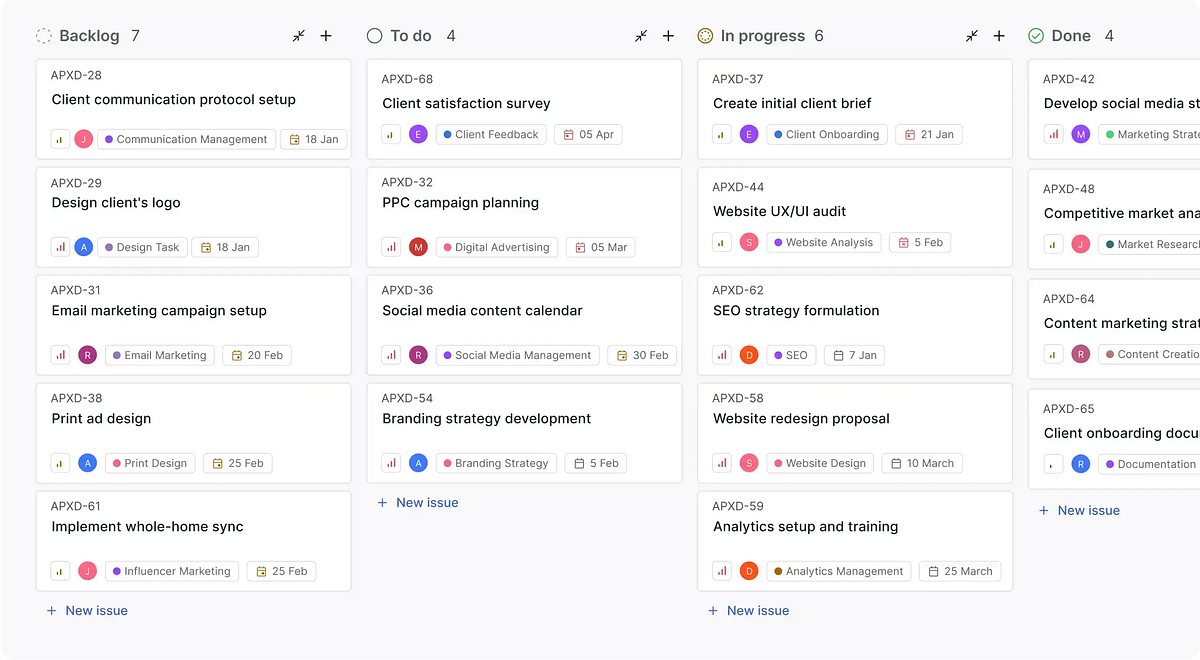
Plane is an open-source project management tool designed to be a free alternative to Jira. It offers features such as task management, project tracking, and team collaboration, all within an easy-to-use interface. With Plane, you can create, manage, and track projects just like you would with Jira, but without the price tag.
Prerequisites:
- Docker: A containerization platform used to run applications in isolated environments.
- Docker Compose: A tool for defining and running multi-container Docker applications.
Both Docker and Docker Compose are essential for this setup. If you're unfamiliar with Docker, you can find detailed installation instructions for Ubuntu servers here: https://www.digitalocean.com/community/tutorials/how-to-install-and-use-docker-on-ubuntu-20-04
For other operating systems, refer to the official Docker documentation or look for tutorials specific to your platform.
Step-by-Step Guide to Setting Up Plane
Here, now we are going to setup plane on a my AWS server. You can use own server. Even you can use free one from AWS like EC2 or lightsale.
Step 1: Connect to Your Remote Server
Before proceeding, ensure you have access to your remote server. Use your preferred method, such as SSH or a remote desktop connection, to log in.

Step 2: Verify Docker and Docker Compose Installation
Once connected to your remote server, execute the following commands to confirm that Docker and Docker Compose are installed and their versions:
docker --version
docker-compose version
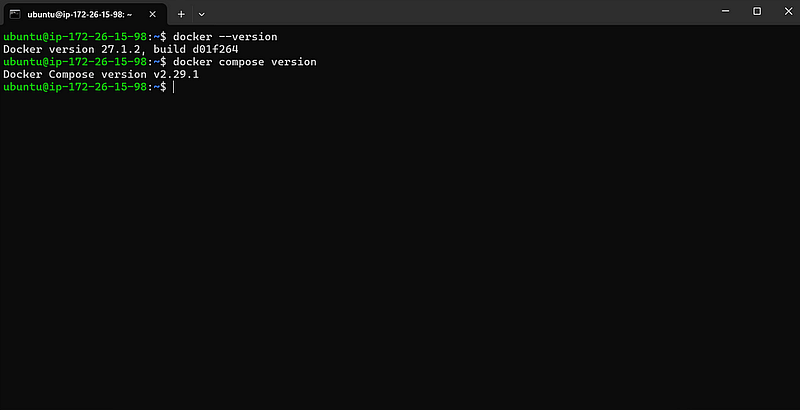
If either command returns an error or an unsupported version, you'll need to install or update the respective tool.
Note: This version check is primarily to ensure that both Docker and Docker Compose are installed and accessible on your system. The specific versions may not be critical unless you're dealing with compatibility issues or require certain features.
Step 3: Clone the Official Plane Setup from GitHub
Now, to acquire the necessary files and configuration for Plane, we'll clone the official Plane setup from GitHub using the following command:
git clone git@github.com:makeplane/plane.git
This command will download the Plane repository into a new directory named "plane" (by default) within your current working directory on the server.

Once the cloning process is complete, you'll have a local copy of the Plane repository on your server. This directory will contain all the necessary files and configuration options for setting up Plane.
Step 4: Navigate to the Plane Directory
Navigate into the newly created "plane" directory:
cd plane
Step 5: Run the Setup Script
Run the setup script to configure and install Plane:
./setup.sh
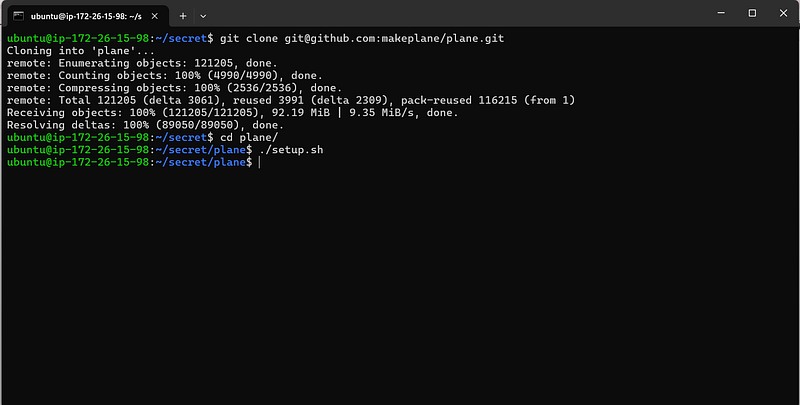
This script will guide you through the necessary steps to set up Plane on your server, including configuration settings.
Step 6: Environment Variables
Plane relies on environment variables to configure various aspects of its functionality. Here's how to update them:
Let's navigate to the following directories within your Plane installation:
/plane/web/.env/plane/space/.env/plane/admin/.env/plane/apiserver/.env/plane/.env
Step 7: Edit the .env File
Within each directory, locate and edit the .env file. This file contains pre-defined variables you can modify to suit your setup.
Environment File 1: /plane/web
Inside web, update environment file:
NEXT_PUBLIC_API_BASE_URL="<your-domain-here>"
NEXT_PUBLIC_ADMIN_BASE_URL="<your-domain-here>"
NEXT_PUBLIC_ADMIN_BASE_PATH="/god-mode"
NEXT_PUBLIC_SPACE_BASE_URL="<your-domain-here>"
NEXT_PUBLIC_SPACE_BASE_PATH="/spaces"
Environment File 2: /plane/space
Inside space, update environment file:
NEXT_PUBLIC_API_BASE_URL="<your-domain-here>"
NEXT_PUBLIC_WEB_BASE_URL="<your-domain-here>"
NEXT_PUBLIC_SPACE_BASE_PATH="/spaces"
Environment File 3: /plane/admin
Inside admin, update environment file:
NEXT_PUBLIC_API_BASE_URL="<your-domain-here>"
NEXT_PUBLIC_ADMIN_BASE_PATH="/god-mode"
NEXT_PUBLIC_WEB_BASE_URL="<your-domain-here>"
Environment File 4: /plane/apiserver
Inside apiserver, update environment file:
# Backend
# Debug value for api server use it as 0 for production use
DEBUG=0
CORS_ALLOWED_ORIGINS="<your-domain-here>"
# Error logs
SENTRY_DSN=""
SENTRY_ENVIRONMENT="development"
# Database Settings
POSTGRES_USER="plane"
POSTGRES_PASSWORD="plane"
POSTGRES_HOST="plane-db"
POSTGRES_DB="plane"
POSTGRES_PORT=5432
DATABASE_URL=postgresql://${POSTGRES_USER}:${POSTGRES_PASSWORD}@${POSTGRES_HOST}:${POSTGRES_PORT}/${POSTGRES_DB}
# Redis Settings
REDIS_HOST="plane-redis"
REDIS_PORT="6379"
REDIS_URL="redis://${REDIS_HOST}:6379/"
# AWS Settings
AWS_REGION=""
AWS_ACCESS_KEY_ID="<your-aws-s3-key>"
AWS_SECRET_ACCESS_KEY="<your-aws-s3-secret>"
AWS_S3_ENDPOINT_URL="<your-aws-s3-endpoint>"
# Changing this requires change in the nginx.conf for uploads if using minio setup
AWS_S3_BUCKET_NAME="<your-aws-s3-bucket-name>"
# Maximum file upload limit
FILE_SIZE_LIMIT=5242880
# Settings related to Docker
DOCKERIZED=1 # deprecated
# set to 1 If using the pre-configured minio setup
USE_MINIO=1
# Nginx Configuration
NGINX_PORT=8080
# Email redirections and minio domain settings
WEB_URL="<your-domain-here>"
# Gunicorn Workers
GUNICORN_WORKERS=2
# Base URLs
ADMIN_BASE_URL=
SPACE_BASE_URL=
APP_BASE_URL=
# Hard delete files after days
HARD_DELETE_AFTER_DAYS=60
SECRET_KEY="_1xvl_(rstu%sp#(50$-osmd=^mlcf8^0+6+h)&1sc_%8tx94s"
Environment File 5: /plane/
Inside plane, update environment file:
# Database Settings
POSTGRES_USER="plane"
POSTGRES_PASSWORD="plane"
POSTGRES_DB="plane"
PGDATA="/var/lib/postgresql/data"
# Redis Settings
REDIS_HOST="plane-redis"
REDIS_PORT="6379"
# AWS Settings
AWS_REGION=""
AWS_ACCESS_KEY_ID="<your-aws-s3-key>"
AWS_SECRET_ACCESS_KEY="<your-aws-s3-secret>"
AWS_S3_ENDPOINT_URL="<your-aws-s3-endpoint>"
# Changing this requires change in the nginx.conf for uploads if using minio setup
AWS_S3_BUCKET_NAME="<your-aws-s3-bucket-name>"
# Maximum file upload limit
FILE_SIZE_LIMIT=5242880
# GPT settings
OPENAI_API_BASE="https://api.openai.com/v1" # deprecated
OPENAI_API_KEY="<your-openai-key>" # deprecated
GPT_ENGINE="gpt-3.5-turbo" # deprecated
# Settings related to Docker
DOCKERIZED=1 # deprecated
# set to 1 If using the pre-configured minio setup
USE_MINIO=1
# Nginx Configuration
NGINX_PORT=8080
Step 8: Start Plane with Docker Compose
Once you've updated the environment variables, you're ready to start Plane using Docker Compose.
From the root directory of your Plane installation (where the docker-compose.yml file is located), run the following command:
docker-compose up -d
This command will instruct Docker Compose to build the necessary images, create containers based on those images, and start the containers in detached mode (background).
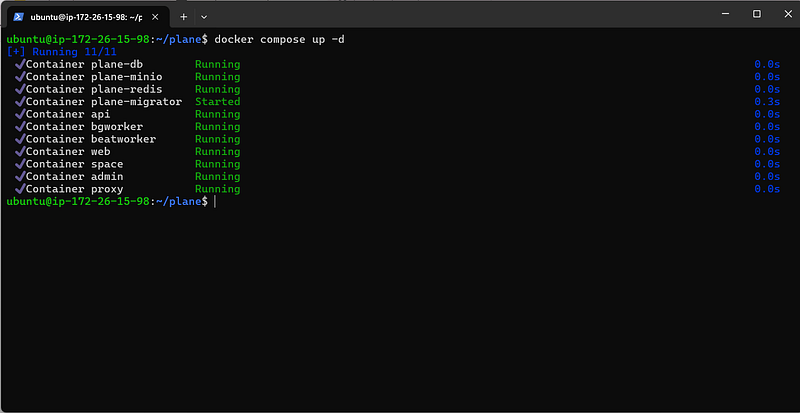
Once the process completes, you should see a message indicating that Plane has started successfully. You can also use the docker ps command to verify that the Plane containers are running.
Note: If you encounter any errors during the startup process, check the logs of the containers using the docker logs <container_name> command to identify the specific issue.
Step 9: Configure Nginx for Reverse Proxy (Optional)
This step is optional if you're happy accessing Plane on port 8080. However, if you prefer using a subdomain or a custom domain for Plane, you can configure a reverse proxy with Nginx.
Prerequisites:
- Nginx Installed: Ensure Nginx is installed and running on your server. You can refer to resources like DigitalOcean articles for installation instructions if needed. https://www.digitalocean.com/community/tutorials/how-to-install-nginx-on-ubuntu-20-04
Nginx Configuration 1: Create a New Server Block:
Navigate to the sites-available directory:
sudo vim /etc/nginx/sites-available/plane
Nginx Configuration 2: Update configuration file:
Copy and paste the configuration below. Be sure to update the server_name directive to match your domain.
server {
    listen 80; # Listen on port 80 (adjust if needed)
    server_name <your_domain>;

    location / {
        proxy_pass http://localhost:8080; # Proxy requests to Plane on port 8080
        proxy_set_header Host $host;
        proxy_set_header X-Real-IP $remote_addr;
        proxy_cache_bypass $http_upgrade;
        proxy_cache_revalidate on;
        proxy_buffering off;
    }
}
Nginx Configuration 3: Enable the Server Block:
Create a symlink to the plane file in the sites-enabled directory:
sudo ln -s /etc/nginx/sites-available/plane /etc/nginx/sites-enabled/plane
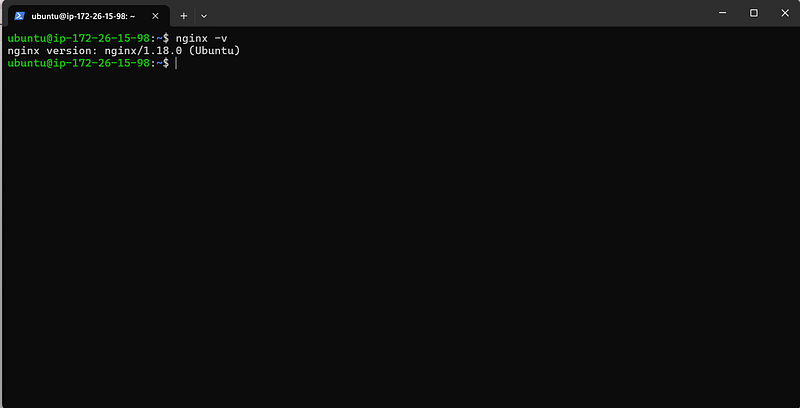
Nginx Configuration 4: Testing Nginx Configuration
sudo nginx -t
Nginx Configuration 5: Reload Nginx:
Restart Nginx to apply the changes:
sudo systemctl restart nginx
Step 10: Verify Access
If everything is configured correctly, you should be able to access Plane using your subdomain or domain (e.g., http://plane.mondaygeek.net.in).
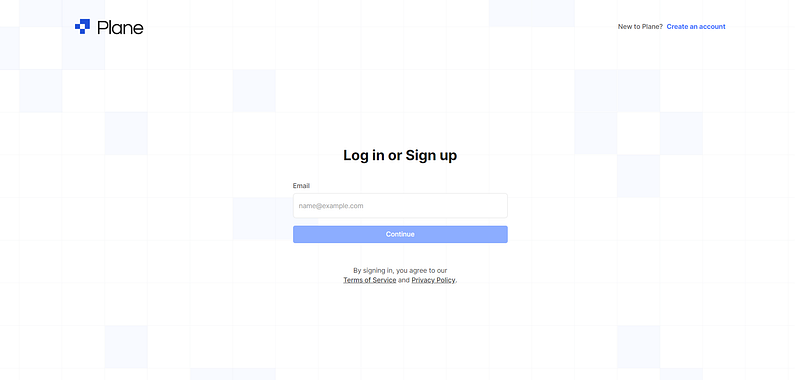
Step 11: Create the First Admin User
Navigate to the Admin URL: Open your web browser and go to your subdomain or domain (e.g., http://plane.mondaygeek.net.in/god-mode/).
You'll likely be prompted to log in with your credentials. If you haven't set up a default admin user yet, you might be able to create one directly from the login page.
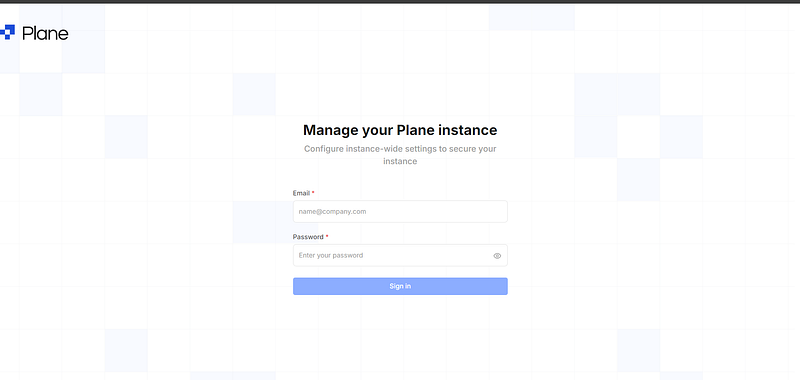
Step 12: Why Admin Panel?
Initial Access:
- Login: After creating the initial admin user, you can log in to the admin panel using the provided credentials.
- Restricted Access: Initially, the admin panel might be configured to only allow access to the admin user you just created.
Admin Panel Functionality:
- Configuration Settings: The admin panel provides a central hub for managing Plane's configuration.
- SMTP Credentials: Update SMTP settings for sending emails within Plane.
- Server Settings: Configure server-related settings, such as the server name and domain.
- Privacy and Security: Adjust Plane's public/private settings to control user registration and access.
Note: The admin panel's features and layout may vary by Plane version. For detailed information, consult the Plane documentation.

Congratulations! You've successfully set up Plane and are ready to start using its features.
Conclusion
With Plane, you now have a powerful, free alternative to Jira for managing your projects and tasks. Docker ensures a smooth setup and consistent operation across different environments. Enjoy managing your projects with Plane, and consider contributing to the Plane community or seeking support if needed!!
If you have any questions or run into issues during the setup, feel free to reach out for support or consult the Plane community for help. Happy project managing!