- Published on
Okta Authentication in React and FastAPI
- Authors

- Name
- Yashraj Singh
- ysraz-singh
Today, we will explore the process of seamlessly integrating Okta Authentication into both the frontend and backend of our application. On the frontend, we'll be using React with TypeScript, powered by Vitejs, while the backend will be built using FastAPI, a Python framework.
While researching extensively and consulting official documentation, I noticed a gap in the availability of comprehensive resources that provide a step-by-step guide for Okta authentication integration across both frontend and backend components. This article aims to fill that gap, presenting a holistic approach.
A Basic Overview
Before we dive in, let's establish a key prerequisite: the frontend and backend components share the same domain. For the purpose of illustration, let's imagine that the frontend resides at https://localhost:8000, and the backend (accessible through FastAPI's documentation) is accessible at https://localhost:8000/docs. Additionally, all API endpoints are prefixed with /api.
Attention: It's worth noting that I've employed https instead of http in the above URLs. I'm fully aware that localhost routes lack security, and I've done so solely to draw attention at the outset of this article.
With these preliminary considerations, let's embark on our journey without further ado.
Getting Started with Okta
Now, First of all we have to create an okta developer account. Don't worry it is free to use. You only need to have an Gmail or say Google Account to Create an account on Okta. Here is link for reference.
Okta Developer Portal
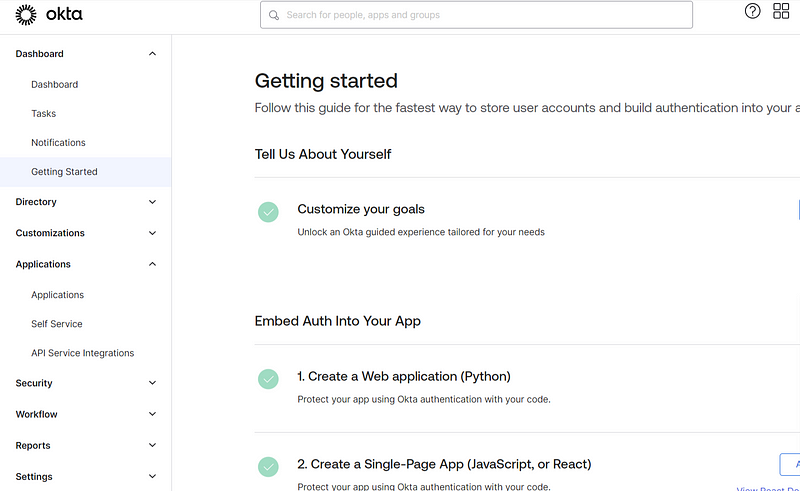
After Successfully Logged In, the dashboard of Okta will look like below:
Setting Up the Okta Application
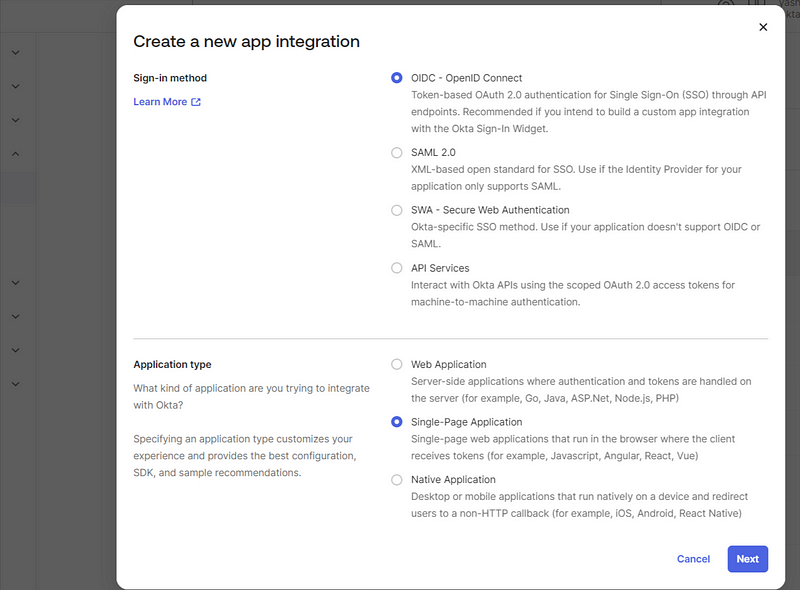
Following that, click on "Applications" located within the "Application Section" to initiate the creation of a new application. Once you've clicked on the "Create New Application" button, proceed to select "OIDC" under "Sign-In Methods" and "Single-Page Application" from the "Application Type" options.
Implementation Steps
Subsequently, you should input your application's name and select "Authorization code" and "Refresh Token" under the "Grant Type" section. In the next step, you'll need to specify your Sign-In and Sign-Out redirect URIs, which are used for redirection during the sign-in and sign-out processes. Ensure that these URIs match your application's routes. In my case, they are as follows:
- Sign-Out Redirect URI: http://localhost:8000/
- Sign-In Redirect URI: http://localhost:8000/login/callback
Controlled Access is optional and can be chosen based on your specific requirements. I'm opting for the first option, which allows everyone in your organization to access the application.
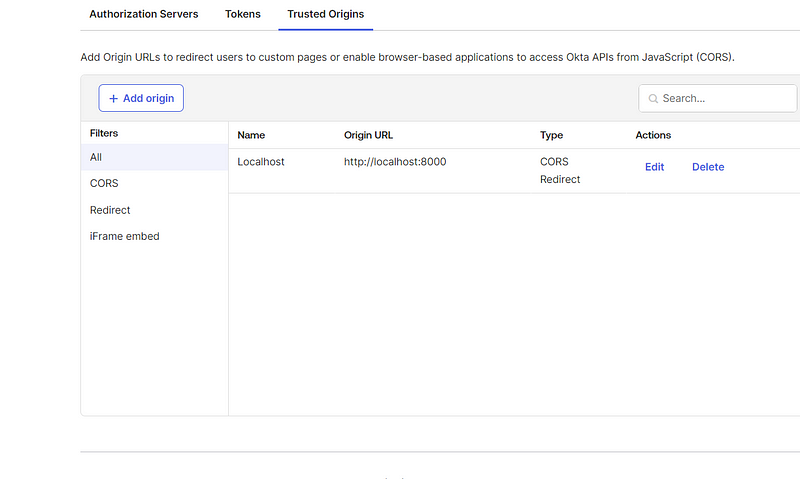
Lastly, the only remaining task is configuring Cross-Origin Resource Sharing (CORS). To do this, navigate to the "API" tab under the "Security" section and add a new origin.
Now that we've completed the necessary steps in our web browser, let's shift our focus to the code. Our next steps involve working on the frontend (React app) initially, and subsequently, we will integrate the frontend with Okta and connect it to our backend (FastAPI).
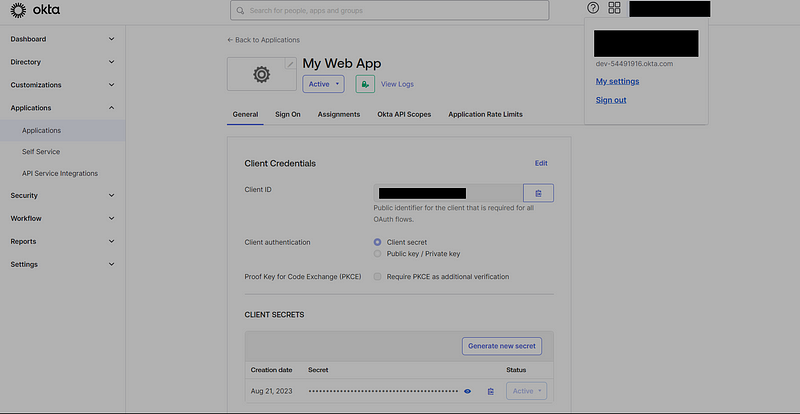
However, it's crucial to keep in mind that we must utilize our Okta Issuer Domain and Client ID in both the frontend and backend. Therefore, we may need to revisit this configuration later on.
Related Tutorials
And, here below are the links for Okta Authentication in React App and FastAPI respectively. Hope sounds you good.
Conclusion
In conclusion, this article has guided you through the process of seamlessly integrating Okta Authentication into both the frontend and backend of your application. It stressed the importance of maintaining consistency in configuration between the two components. To further expand your knowledge on this topic, explore the provided links to dedicated tutorials for configuring Okta Authentication in a React App using Vitejs.